Wednesday, December 2, 2009

[kid focus] snowman


I had two sizes of styrofoam balls sitting on my table, and Elle instantly thought they were snowmen. She loved the idea of actually turning them into real snowmen, so I got out my glue gun, some yarn, black eyelets, twigs, mini clothespins and orange paint. The great thing was that I actually had all of those supplies just sitting in my craft room.

To create the snowmen, we glued the two styrofoam balls together (1 large and 1 small for the mom and dad snowmen and 2 small for Elle and Liv's snowmen).  We took apart the mini clothespins and painted each piece orange. We pressed the painted clothespin piece into the styrofoam for a nose; stuck twigs in each side of the snowman for arms and pressed black eyelets into the styrofoam for eyes.  I filled in the eyes with black Stickles, but you could fill it in with black paint, marketer etc. We then hand crocheted scarves and hats for each of the snowman.  It ended up being a fast, impromptu activity which Elle couldn't wait to show off to her dad.

Monday, November 30, 2009

thanksgiving table


This Thanksgiving, I went with a natural theme for the table decor so I focused on natural textures and elements in neutral colors with green accents.


I printed the menus and placecards on L Letterpress paper in cream and then used the L Letterpress to blind emboss the matching design on both pieces. 


For additional table conversation, I printed Thanksgiving trivia on L Letterpress paper and then die cut it using a QuicKutz leaf die cut.  The leaf has a fun pop up element that added extra texture and dimension to the decor.


I had originally anticipated going with a more modern design theme, but found these harvest -themed ceramic dinner and salad plates at Shopko for only $.50 each.  Secretly I had wanted to purchase plates for the dinner, but hadn't figure out how I could justify it. I had been thinking white square dinnerware, but at only $.50 each for this style, it was a deal I couldn't pass up.  I ended up loving the way the plates turned out.

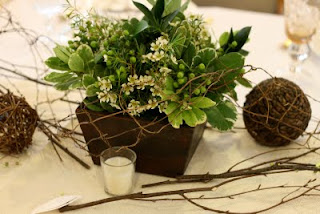
The pictures below show how the finished product. There were 31 people seated at the table (my mother-in-law's dinner table combined with two fold up tables next to each other). I used branches, pumpkins (painted off-white), floral greenery for the centerpieces, votives, cream candles, bronze candle holders, twine and twig balls, wire twig garland, stick placemats and burlap.


thankful tree


For Family Home Evening last week, we made a thankful tree.  I die cut and glued a tree trunk to a piece of white paper and then die cut leaves from adhesive-backed cardstock.  We each took turns listing things we were thankful for and then stuck the leaf to the paper. I'm not sure she really grasped the concept of being thankful - she was much more interested in getting to stick another leaf down.  But, it was funny to hear some of things she was thankful for...family was followed by dogs and swimming at the hotel.

Sunday, November 29, 2009

thanksgiving kids table

For the kids table this Thanksgiving, I used kraft colored contractor paper from Lowe's as the tablecloth.  I then drew a placemat for each child with a white paint marker.  The girls had a scalloped border and the boys a plain square border. 

The kids could then color and decorate their placemat with color crayons. 


I also cut out several cardstock turkey feathers and scattered them on the table. The kids wrote things they were thankful for and then stuck the feather to the back of a turkey pumpkin.  


baby O shower


My friend Laura threw an amazing baby shower for her sister. Lucky for me, she made the invitations at my house so I got to watch the creativity in action.  She incorporated several letterpress elements into the party using the L Letterpress.  See more at Lucyisms.