
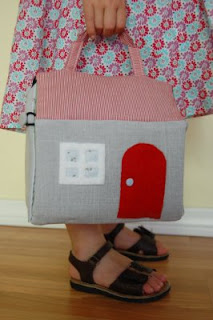
I'd like to try this pattern. I'm wondering if it would work well for a diaper bag???


 - metal sheet (given to me by a friend who bought it from a local steel company that will cut sheets to any size)
 - Cut a piece of adhesive backed magnet sheet to fit your piece of patterned paper.
 - Draw a circle around the glass pebble.
 - Cut out circle.
 - Use your Silhouette to cut out desired words in any font you like.
 - Place transfer tape over the top of the vinyl word and rub to adhere to vinyl.
 - Remove backing from vinyl and place vinyl word on metal sheet.
 Last year I wanted the perfect Easter basket for Elle but couldn't find one that I liked so I decided to make my own. It was really easy and satisfied my need to create and make something. I went for an earthy, natural look with leaves and the color green.


I must be thinking spring - here's another post with terra cotta pots. I love this idea for entertaining. It's simple and allows you to pull together a cohesive look easily and without a lot money.

 Check out this tutorial from five and a half to create your own photo journals. I love any and all notebooks. They're the perfect place to express and dream up creativity.

Anything planning, calendar and/or notebook is right up my alley.
From Martha Stewart: Leather is forgiving to work with -- it doesn't fray, so there's no need to finish edges, and if you purchase a 1/16-inch or thinner hide, it can be fed through a sewing machine. You'll need sturdy poly-cotton thread, a leather needle, and a Teflon pressure foot, which will keep the leather steady. Raise the tension according to your sewing machine's instructions, and make the stitches slightly longer than you would with fabric, to prevent the leather from tearing. Mark lines by scoring with a bone folder before sewing.
Tools and Materials:
One hide (5 1/2 square feet) leatherNo-slip rulerRotary cutter
Multipurpose cement
Poly-cotton threadSewing machine equipped for leather
Leather hole punch
1/2-inch binder rivets
7-inch 6-ring spine
Rivet setter
Mallet
Paper inserts
Grommet kit or elastic cording (optional)
1. For standard refills (6 3/4 by 3 3/4 inches), use a rotary cutter to cut a rectangle of leather that is 10 3/8 by 7 1/8 inches. Mark the midpoint of the length, and score with the bone folder. For the closure, cut a 3 1/2-by-1-inch tab to fit in a 3-by-1/4-inch strip.
2. Cement a 1/4 inch of the tab halfway up the inside of the back cover of the planner; let dry, and then sew. Cement the strip halfway up the outside of the front cover; let dry, and sew ends. For side flaps, cut two 3 1/4-by-7 1/8-inch pieces. Cement them on all but the inside long edge; let dry, and then sew all around, leaving a 1/4-inch border.
3. Backstitch at start and finish. Place the spine on the halfway point, mark each hole with a pencil, and punch out marks with a hole punch. Align bar over holes, and stick rivet posts through each one; snap the cap pieces onto posts from the other side. Position rivet setter over each rivet head, and pound them into place with the mallet. Fill binder with paper inserts. Use flaps to store loose items.
First Published: January 2003 Martha Stewart
 I love the clean, stylish look of this framed fabric project by Martha Stewart. Maybe I'll implement this in the girls' room.


